Are you looking for ways to improve your customer experience but don’t know where to start? Creating a customer journey map in Google Analytics can help.
A customer journey map can help your business track and visualize the various touchpoints a customer has with your brand, from initial awareness to post-purchase follow-up. By mapping out these interactions, you can gain valuable insights into where customers are getting stuck or dropping off, and make necessary changes to enhance the overall customer experience.
Customer journey tracking is simple with the right plugins. If you’re selling digital products or downloads, you can use the MonsterInsights User Journey addon with Easy Digital Downloads. The report generated from these tools gives you a clear idea of the pages each of your customers browsed through before making a purchase:

In this post, we’ll walk you through step-by-step how to create a customer journey map in Google Analytics in the following 5 steps:
Step 1: Install and Activate Easy Digital Downloads
If you haven’t already done so, the first step is to install and activate the Easy Digital Downloads (EDD) plugin:

This is a complete eCommerce solution for selling digital downloads and products. It comes packed with helpful tools and features for managing your online store, including detailed reporting and tracking for customer data and insights.
We recommend grabbing an EDD All Access Pass. This will ensure that you get unlimited access to all the plugin features, including the wide range of extensions offered with it.
Once you purchase your plan, you can download the plugin from your account dashboard. Then you can upload it to your site by navigating to Plugins » Add New » Upload Plugin » Choose File:

After you select the zipped file, you can click on Install Now, followed by Activate Plugin.
Step 2: Install and Activate MonsterInsights
The next plugin you’ll want to install is MonsterInsights:

MonsterInsights is a WordPress plugin that lets you easily connect your WordPress site to Google Analytics. You can use it to collect accurate data and measure key metrics about your website traffic and visitors. You can also see exactly how people are finding and using your website.
Plus, when you install the MonsterInsights plugin on your website, you’ll be able to view these valuable insights directly from our dashboard. It integrates seamlessly with EDD, so you can use them both to better understand and track the customer journey.
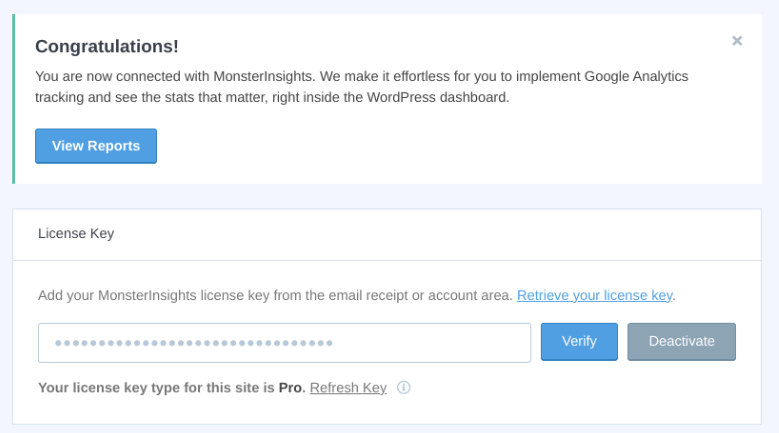
We recommend purchasing a Pro plan so that you can use all of the features, including the addons we’ll be using for this tutorial. After you complete your purchase, you can download and install the plugin and enter your license key.

Step 3: Connect Your Site to Google Analytics
Once you activate the plugin, you’ll need to connect it to your Google Analytics account. If you don’t already have an account and website property set up, you can follow this guide to get started.
Click on the Connect MonsterInsights and Setup Site Analytics button that appears along the top notification bar:

This will take you to a setup wizard. You can follow the prompts to get started.
Select Connect MonsterInsights:

Next, you’ll need to select your Google account to sign in with:

You’ll be asked to confirm permissions for the plugin. Click Allow:

On the next screen, you can choose the website (property) you want to connect the account to, then select Complete Connection:

You’ll be able to specify who can see reports, and more. Proceed to click Continue.
Step 4: Set Up the eCommerce and User Journey Addons
Once you have your site connected to your Google Analytics account, you can install the eCommerce and User Journey addons. These analytics tools can help you connect your environments to establish a clearer understanding of customer touchpoints and customer behavior to improve your marketing strategy.
The eCommerce addon is a helpful tool that you can use to track sales with Easy Digital Downloads. The User Journey addon lets you see exactly which steps your customers took before making a purchase.
You can find and add each extension by going to Insights » Addons. Under each respective addon, click on the Install button:

Next, go to Insights » eCommerce » eCommerce tracking. Make sure the Easy Digital Downloads and Use Enhanced eCommerce settings are enabled:

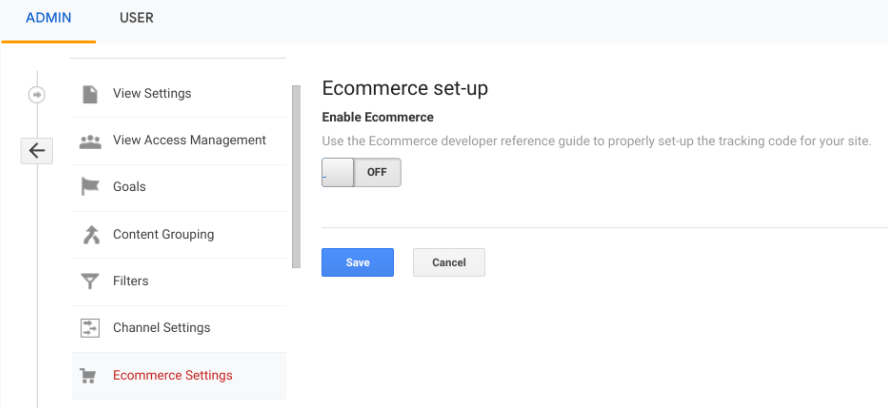
Next, from your Google Analytics dashboard, click on Admin in the bottom-left. Then select Ecommerce Settings:

Toggle the switch to enable Ecommerce:

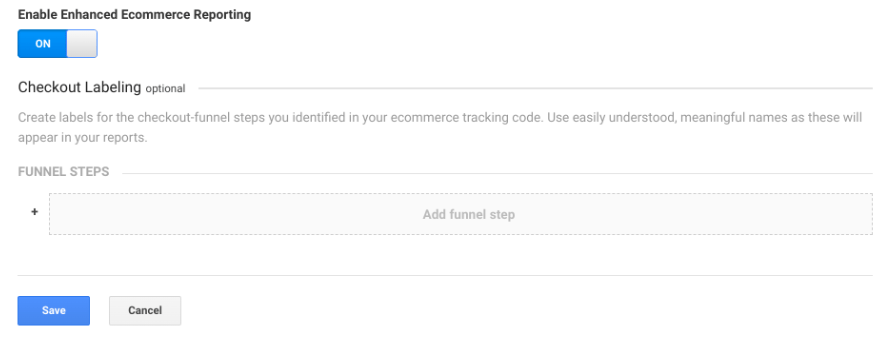
Next, turn on Enable Enhanced Ecommerce Reporting:

You can then begin to add your funnel steps. When you’re done, click the Save button.
Step 5: Track Your Reports
It’s important to stay on top of your reports. Regularly tracking customer journey analytics, key metrics, and monitoring reports can help you identify pain points that may be hurting the customer journey and, in turn, conversion rates.
You can uncover patterns to determine where most of the drop off seems to be happening.
With the User Journey addon activated, once you get orders, you can view the user journey reports by going to Downloads » Orders. Then select the order and scroll down to the User Journey by MonsterInsights section:

There are a handful of other reports you can track. In MonsterInsights, you can find reports by going to Insights » Reports » eCommerce:

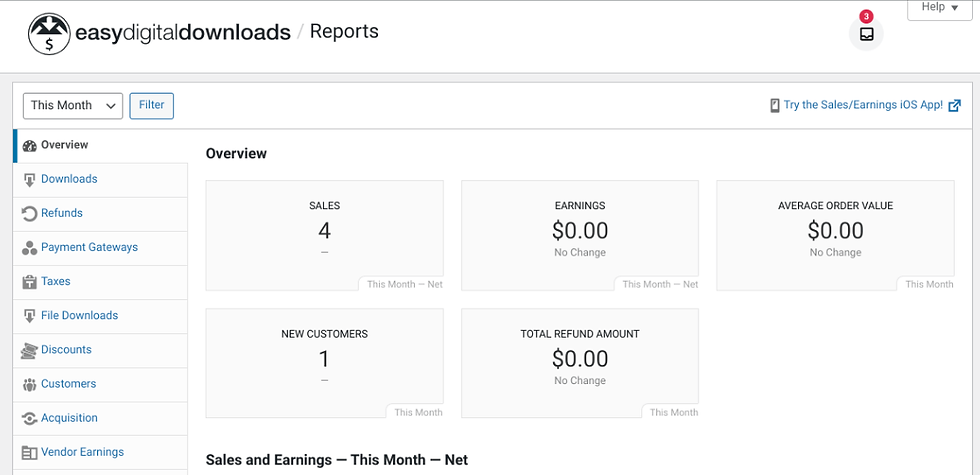
You can also find many helpful reports from Easy Digital Downloads. To view them, you can go to Downloads » Reports from your dashboard:

That’s it! Now you know how to create a customer journey map and where to view essential reports and analytics.
Start Creating Your Customer Journey Map Today
When you’re running an eCommerce website, making sure you have high levels of customer satisfaction is of utmost importance. But to improve the user experience and customer retention, it’s essential to have a clear understanding of their journey through the sales funnel.
Creating a customer journey map in Google Analytics can help boost your digital marketing initiatives. You can use it to optimize the eCommerce shopping experience and eliminate problem areas. To make the customer journey mapping process as simple as possible, you can use Easily Digital Downloads and MonsterInsights.